React로 토이 플젝을 진행 중인데 서버 코드가 필요하고 Express 서버를 사용할까 합니다.
간단하게 Express로 서버를 만들고 React와 연동 시켜보겠습니다.
연동 방법은 create-react-app v2에서 새롭게 추가된 기능 중 하나인 proxy 설정 커스터 마이징을 이용하는 것이고
npm-run-all 모듈을 이용해서 명령어 하나로 client와 server를 동시에 띄워볼려고 합니다.
create-react-app로 플젝이 생성 완료 됬다고 가정하고 진행하겠습니다.
01. server 작성
먼저 src와 같은 level에 server라는 폴더를 만들었습니다.
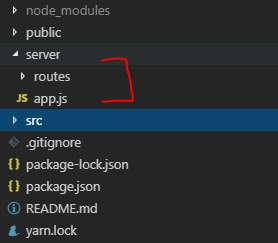
그리고 app.js를 아래와 같이 작성하였습니다.
const express = require('express');
const bodyParser = require('body-parser')
const app = express();
const api = require('./routes/index');

app.use(bodyParser.json());
app.use('/api', api);

const port = process.env.PORT || 3001;
app.listen(port, () => console.log(`Listening on port ${port}...`));- express모듈을 로딩하고, body-parser를 로딩합니다.
- app.use를 통해 bodyParser와 '/api'에 대한 처리를 해줍니다.
- default로 3001번 포트를 listen하도록 합니다.
또한 routes/index.js에 아래와 같이 작성합니다.
const express = require('express');
const router = express.Router();

router.get('/', (req, res) => res.json({data:'this is index.'}));

module.exports = router- 테스트 코드라서 단순이 json형태의 테스트용 데이터를 전송하는 서버입니다.
그리고 아래 명령어로 관련 pakage들을 설치해줍시다.
npm install express body-parser --save서버가 잘 작성 되었는지 확인을 위해 실행 시켜봅시다.
PS C:\mynode\portfolio> node ./server/app.js
Listening on port 3001...
잘 뜨네요.
02. proxy 설정
create-react-server v2에서는 proxy를 간편하게 설정하고, 커스터 마이징 가능합니다.
src폴더 내에 아래와 같이 setProxy.js를 작성해줍니다.
const proxy = require('http-proxy-middleware');

module.exports = function (app) {
    app.use(
        proxy('/api', {
            target: 'http://localhost:3001/'
        })
    );
};- http-proxy-middleware를 로딩합니다.
- '/api' 경로에 대한 프록시 설정을 해줍니다.(react app에서 127.0.0.1/api/* 경로로 요청을 보내면 프록시가 동작하여 127.0.0.1:3001로 요청을 보내게 됩니다.)
마찬가지로 아래 명령어로 관련 pakage 설치해줍시다.
npm install http-proxy-middleware --save
03. node 동시 실행
위의 과정이 완료되었다면, express 서버와 react 연동이 완료되었다 볼 수 있습니다.
하지만 express 서버를 실행하고, 다른 터미널을 열어서 react를 실행해야합니다.
npm-run-all을 이용하면 하나의 명령어로 두개의 script를 실행 시킬 수 있습니다.
먼저 해당 pakage를 설치합시다.
npm install npm-run-all -D
그리고 pakage.json을 열어서 아래와 같이 수정해줍시다.
{
  "name": "test",
  "version": "0.1.0",
  "private": true,
  "dependencies": {
    "body-parser": "^1.19.0",
    "express": "^4.16.4",
    "http-proxy-middleware": "^0.19.1",
    "react": "^16.8.6",
    "react-dom": "^16.8.6",
    "react-router-dom": "^5.0.0",
    "react-scripts": "2.1.8",

  },
  "scripts": {
    "start": "npm-run-all --parallel start:**",
    "start:client": "react-scripts start",
    "start:server": "node ./server/app.js",
    "build": "react-scripts build",
    "test": "react-scripts test",
    "eject": "react-scripts eject"
  },
  ...(생략)
}
- 기존의 start를 npm-run-all --parallel start:** 로 변경시킵니다.
- start:client는 기존의 start에 명세되어 있던 react-scripts start로 변경합니다.
- start:server는 express서버를 띄우는 명령어로 설정해줍시다.
이 후, npm start 명령어로 실행시키면
PS C:\mynode\portfolio> npm start

> portfolio@0.1.0 start C:\mynode\portfolio
> npm-run-all --parallel start:**


> portfolio@0.1.0 start:client C:\mynode\portfolio
> react-scripts start


> portfolio@0.1.0 start:server C:\mynode\portfolio
> node ./server/app.js

Listening on port 3001...
[HPM] Proxy created: /api  ->  http://localhost:3001/
Starting the development server...
Compiled successfully!
위와 같이 로그가 출력되는것을 확인 할 수 있습니다.
'개발 이야기 > React' 카테고리의 다른 글
| React로 ProgressBar 구현하기 (0) | 2019.10.04 |
|---|---|
| Redux-Saga 로 비동기 요청 예제 (0) | 2019.08.18 |
| React 이미지 파일 업로드 하기 (0) | 2019.06.24 |
| React에서 match와 props (0) | 2019.04.27 |
| React용 UI 프레임워크 gestalt 사용해보기 (0) | 2019.04.22 |


