redux-saga는 애플리케이션의 "부작용"들(데이터 요청(fetch) 등의 비동기 작업, 브라우저 캐시 같은 순수하지 않은 것들)을 쉽게 관리하고 효과적으로 실행하고 간단한 테스트와 쉬운 실패 처리를 목적으로 한다.
redux-saga는 애플리케이션에서 필요한 사이드 이펙트를 별도의 스레드로 분리해서 관리할 수 있고, 리덕스의 미들웨어로 리덕스의 액션은 스레드를 시작, 중지, 취소시킬 수 있다고 한다. (redux-saga github에서 발췌)
redux-saga를 이용해서 어떻게 애플리케이션을 작성하는지 나름 정리를 해볼까합니다.
검색요청을 하는 기능을 만든다고 가정합시다.
동작은 간단합니다.
- input box에 검색어 입력
- 검색 버튼 클릭
- 서버로 비동기 요청 수행
- 요청에 대한 성공 또는 실패를 화면에 렌더링
01. 라이브러리 설치
관련 라이브러리들을 설치해봅니다(create-react-app 도구를 이용해서 react 플젝은 이미 만들었다고 가정)
npm install --save redux react-redux redux-saga
02. redux store 구성
src 디렉토리에 store를 추가하고 그림과 같이 구성했습니다.
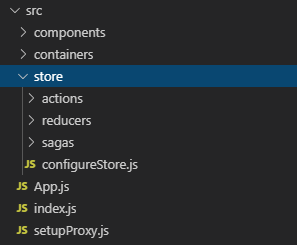
Action, Reducer, Saga 로 분리하여 코드를 작성하였습니다.
차근 차근 코드를 작성해 보겠습니다.
03. Action 작성
./store/actions/index.js
|
1
2
3
4
5
6
7
8
9
10
11
12
13
14
15
16
17
18
19
20
21
22
23
24
|
export const SEARCH = 'SEARCH';
export const SEARCH_SUCCESS = 'SEARCH_SUCCESS';
export const SEARCH_FAIL = 'SEARCH_FAIL';
export function search(payload){
return {
type: SEARCH,
payload
}
}
export function searchSuccess(data){
return {
type: SEARCH_SUCCESS,
data
}
}
export function searchFail(error){
return {
type: SEARCH_FAIL,
error
}
}
|
cs |
검색요청, 요청성공, 요청실패에 대한 액션을 구성하였습니다.
04. Reducer 작성
./store/reducers/SearchReducer.js
./store/reducers/index.js
|
1
2
3
4
5
6
7
8
9
10
11
12
13
14
15
16
17
18
19
20
21
22
23
24
25
26
27
28
29
30
31
32
33
34
35
36
37
38
39
40
|
////// SearchReducer.js
import * as actions from '../actions'
const initialState = {
data: {}
}
export const reducer = (state=initialState, action) => {
switch(action.type){
case actions.SEARCH:
return {
...state,
payload: action.payload
}
case actions.SEARCH_SUCCESS:
return {
...state,
data: action.data
}
case actions.SEARCH_FAIL:
return {
...state,
error: action.error
}
default:
return state;
}
}
///// index.js
import { combineReducers } from 'redux';
import {reducer as search} from './SearchReducer';
const rootReducer = combineReducers({
search,
})
export default rootReducer
|
cs |
위와 같이 리듀서를 작성해줬습니다. 여기까진 아주 단순한 redux 디자인 패턴으로 react-redux 공부하셨다면 익숙한 코드일 겁니다.
reducer에서 액션에 대한 상태처리를 표현하고, index.js에서 combineReducers를 이용해서 rootReducer를 구성 시켰습니다.(container에서 store의 상태값을 빼다 쓸땐 state.search.** 로 가능하게 되는겁니다.)
05. Saga 작성
./store/sagas/SearchSaga.js
./store/sagas/index.js
|
1
2
3
4
5
6
7
8
9
10
11
12
13
14
15
16
17
18
19
20
21
22
23
24
25
26
27
28
29
|
///// SearchSaga.js
import { call, put, takeEvery } from "redux-saga/effects";
import * as actions from "../actions";
import axios from "axios";
function* fetchSearchSaga(action) {
try {
const json = {
name: action.payload
}
const { data } = yield call([axios, 'post'], '/api/nba/player', json)
yield put(actions.searchSuccess(data));
} catch (error) {
yield put(actions.searchFail(error.response));
}
}
export default function* watchSearch() {
yield takeEvery(actions.SEARCH, fetchSearchSaga);
}
///// index.js
import { spawn } from "redux-saga/effects";
import watchSearch from './SearchSaga'
export default function* rootSaga() {
yield spawn(watchSearch);
}
|
cs |
Saga는 제너레이터(Generator)를 사용합니다. 제너레이터는 ES6에서 새로 추가된 함수로 내부에 yield 키워드가 반드시 쓰입니다. 파이썬의 Generator를 가져다왔다고 합니다. 일반함수와의 다른점은... 구글링 해보시면 많은 정보 나옵니다. 저도 명확한 개념이 잡힌건 아니라서...ㅜ,,ㅜ
위와 같이 fetchSearchSaga 제너레이터 함수를 작성해주면, 마치 검색요청기능은 일련의 동기작업 처럼 보이게 코드를 구성시킬수 있습니다. redux-saga의 사이드이펙트 함수인 call, put을 사용했습니다.
그리고 watchSearch 제너레이터 함수는 takeEvery를 사용해서 검색요청 액션 발생 시 fetchSearchSaga를 실행케 합니다.
index.js에서 rootSaga를 구성 시켜줍니다.
06. configureStore 작성
./store/configureStore.js
|
1
2
3
4
5
6
7
8
9
10
11
12
13
14
|
import { createStore, applyMiddleware } from 'redux'
import createSagaMiddleware from 'redux-saga'
import rootReducer from './reducers'
import rootSaga from './sagas'
const sagaMiddleware = createSagaMiddleware()
const store = createStore(
rootReducer,
applyMiddleware(sagaMiddleware)
)
sagaMiddleware.run(rootSaga)
export default store;
|
cs |
store를 만들고 saga를 미들웨어로 사용합니다.
그리고 src/index.js에 아래와 같이 store를 추가해줍니다.
|
1
2
3
4
5
6
7
8
9
10
11
12
13
14
|
import React from "react";
import ReactDOM from "react-dom";
import App from "./App";
import { Provider } from "react-redux";
import store from "./store/configureStore";
ReactDOM.render(
<Provider store={store}>
<App />
</Provider>,
document.getElementById("root")
);
|
cs |
07. Container 작성
./containers/SearchContainer.js
|
1
2
3
4
5
6
7
8
9
10
11
12
13
14
15
16
17
18
19
20
21
22
23
24
25
26
27
28
29
30
31
32
33
34
35
36
37
38
39
40
41
42
43
44
45
46
47
48
49
50
51
52
53
54
55
56
57
58
59
60
|
import React, { Component } from 'react'
import {connect } from 'react-redux'
import Search from '../components/Search'
import SearchResult from '../components/SearchResult'
import * as actions from '../store/actions'
class SearchContainer extends Component {
constructor(props){
super(props);
this.state = {
name: '' // input에 입력되는 value
}
}
// arrow function으로 작성하면 bind(this) 할 필요없다
onChanageInput = (e) => {
this.setState({
name: e.target.value
})
}
render() {
return (
<div>
<Search
name={this.state.name}
onSearch={this.props.onSearch}
onChangeInput={this.onChanageInput}
/>
{
this.props.error?<div>Something wrong!</div>
:
<SearchResult
data={this.props.data}
/>
}
</div>
)
}
}
const mapStateToProps = (state) => {
return {
data : state.search.data,
error: state.search.error
}
}
const mapDispatchToProps = (dispatch) => {
return {
onSearch: (text) => {
dispatch({type: actions.SEARCH, payload: text});
}
}
}
export default connect(
mapStateToProps,
mapDispatchToProps)(SearchContainer);
|
cs |
위와 같이 컨테이너를 작성해줍니다. 컨테이너는 해당 컴포넌트의 기능을 포함시키는 코드를 가지며, redux의 store, dispatch와 직접적으로 연동이 되는 모듈입니다.
- name : container에서 선언한 state로 inputbox의 value를 렌더링 하기위한 값입니다.
- onSearch : 검색요청 액션을 디스패칭하는 함수입니다.
- onChangeInput : container에서 선언한 함수로 inputbox의 change 이벤트 처리를 담당합니다.
08. Component 작성
./component/Search.js
./component/SearchResult.js
|
1
2
3
4
5
6
7
8
9
10
11
12
13
14
15
16
17
18
19
20
21
22
23
24
25
26
27
28
29
30
31
32
33
34
35
36
37
38
39
|
///// Search.js
import React from 'react'
const Search = (props) => {
return (
<div>
<input type='text' name='name' onChange={props.onChangeInput}/>
<br/>
<button type='button' onClick={() => props.onSearch(props.name)}>Search</button>
</div>
)
}
export default Search
//// SearchResult.js
import React, {memo} from 'react'
const SearchResult = (props) => {
const viewItems = (data) => {
if(!data.data){
return 'please search'
} else{
return <div>
name: {data.data.pName}
</div>
}
}
return (
<div>
{viewItems(props.data)}
</div>
)
}
export default memo(SearchResult);
|
cs |
Search.js는 inputbox와 button으로 구성시키고,
SearchResult.js는 api 결과 data를 화면에 렌더링합니다. (data 구조는 무시해도 됩니다.. 기존에 만들어놓은 api로 테스트하다보니 구조가 좀 엉망이에요..ㅎㅎ)
memo는 react의 hook api 인데요. SearchResult 컴포넌트를 pure component로 만들어 줍니다.(내용은 구글링 고고욤)
이렇게 redux-saga를 사용해서 비동기 요청 api에 대한 처리를 패턴화 하여 코딩해봤습니다.
개념이 잘 정립되지 않은 상태에서 따라하기식으로 작성해봤는데. redux-saga... 좀 개념잡기가 어렵긴 하네요. ㅜㅜ
'개발 이야기 > React' 카테고리의 다른 글
| React 프로젝트 Font 적용하기 (0) | 2019.11.16 |
|---|---|
| React로 ProgressBar 구현하기 (0) | 2019.10.04 |
| React 이미지 파일 업로드 하기 (0) | 2019.06.24 |
| React와 Express 서버 연동 시키기 (0) | 2019.04.28 |
| React에서 match와 props (0) | 2019.04.27 |


